How to Configure a Cloudflare Email Address with Trulyinbox?
Connect your Cloudflare email to TrulyInbox using SMTP/IMAP so you can start warming up your mailbox and improve deliverability.
This guide walks you through connecting your Cloudflare email address to TrulyInbox using the SMTP/IMAP method. Once connected, TrulyInbox can begin sending and receiving warm-up emails automatically.
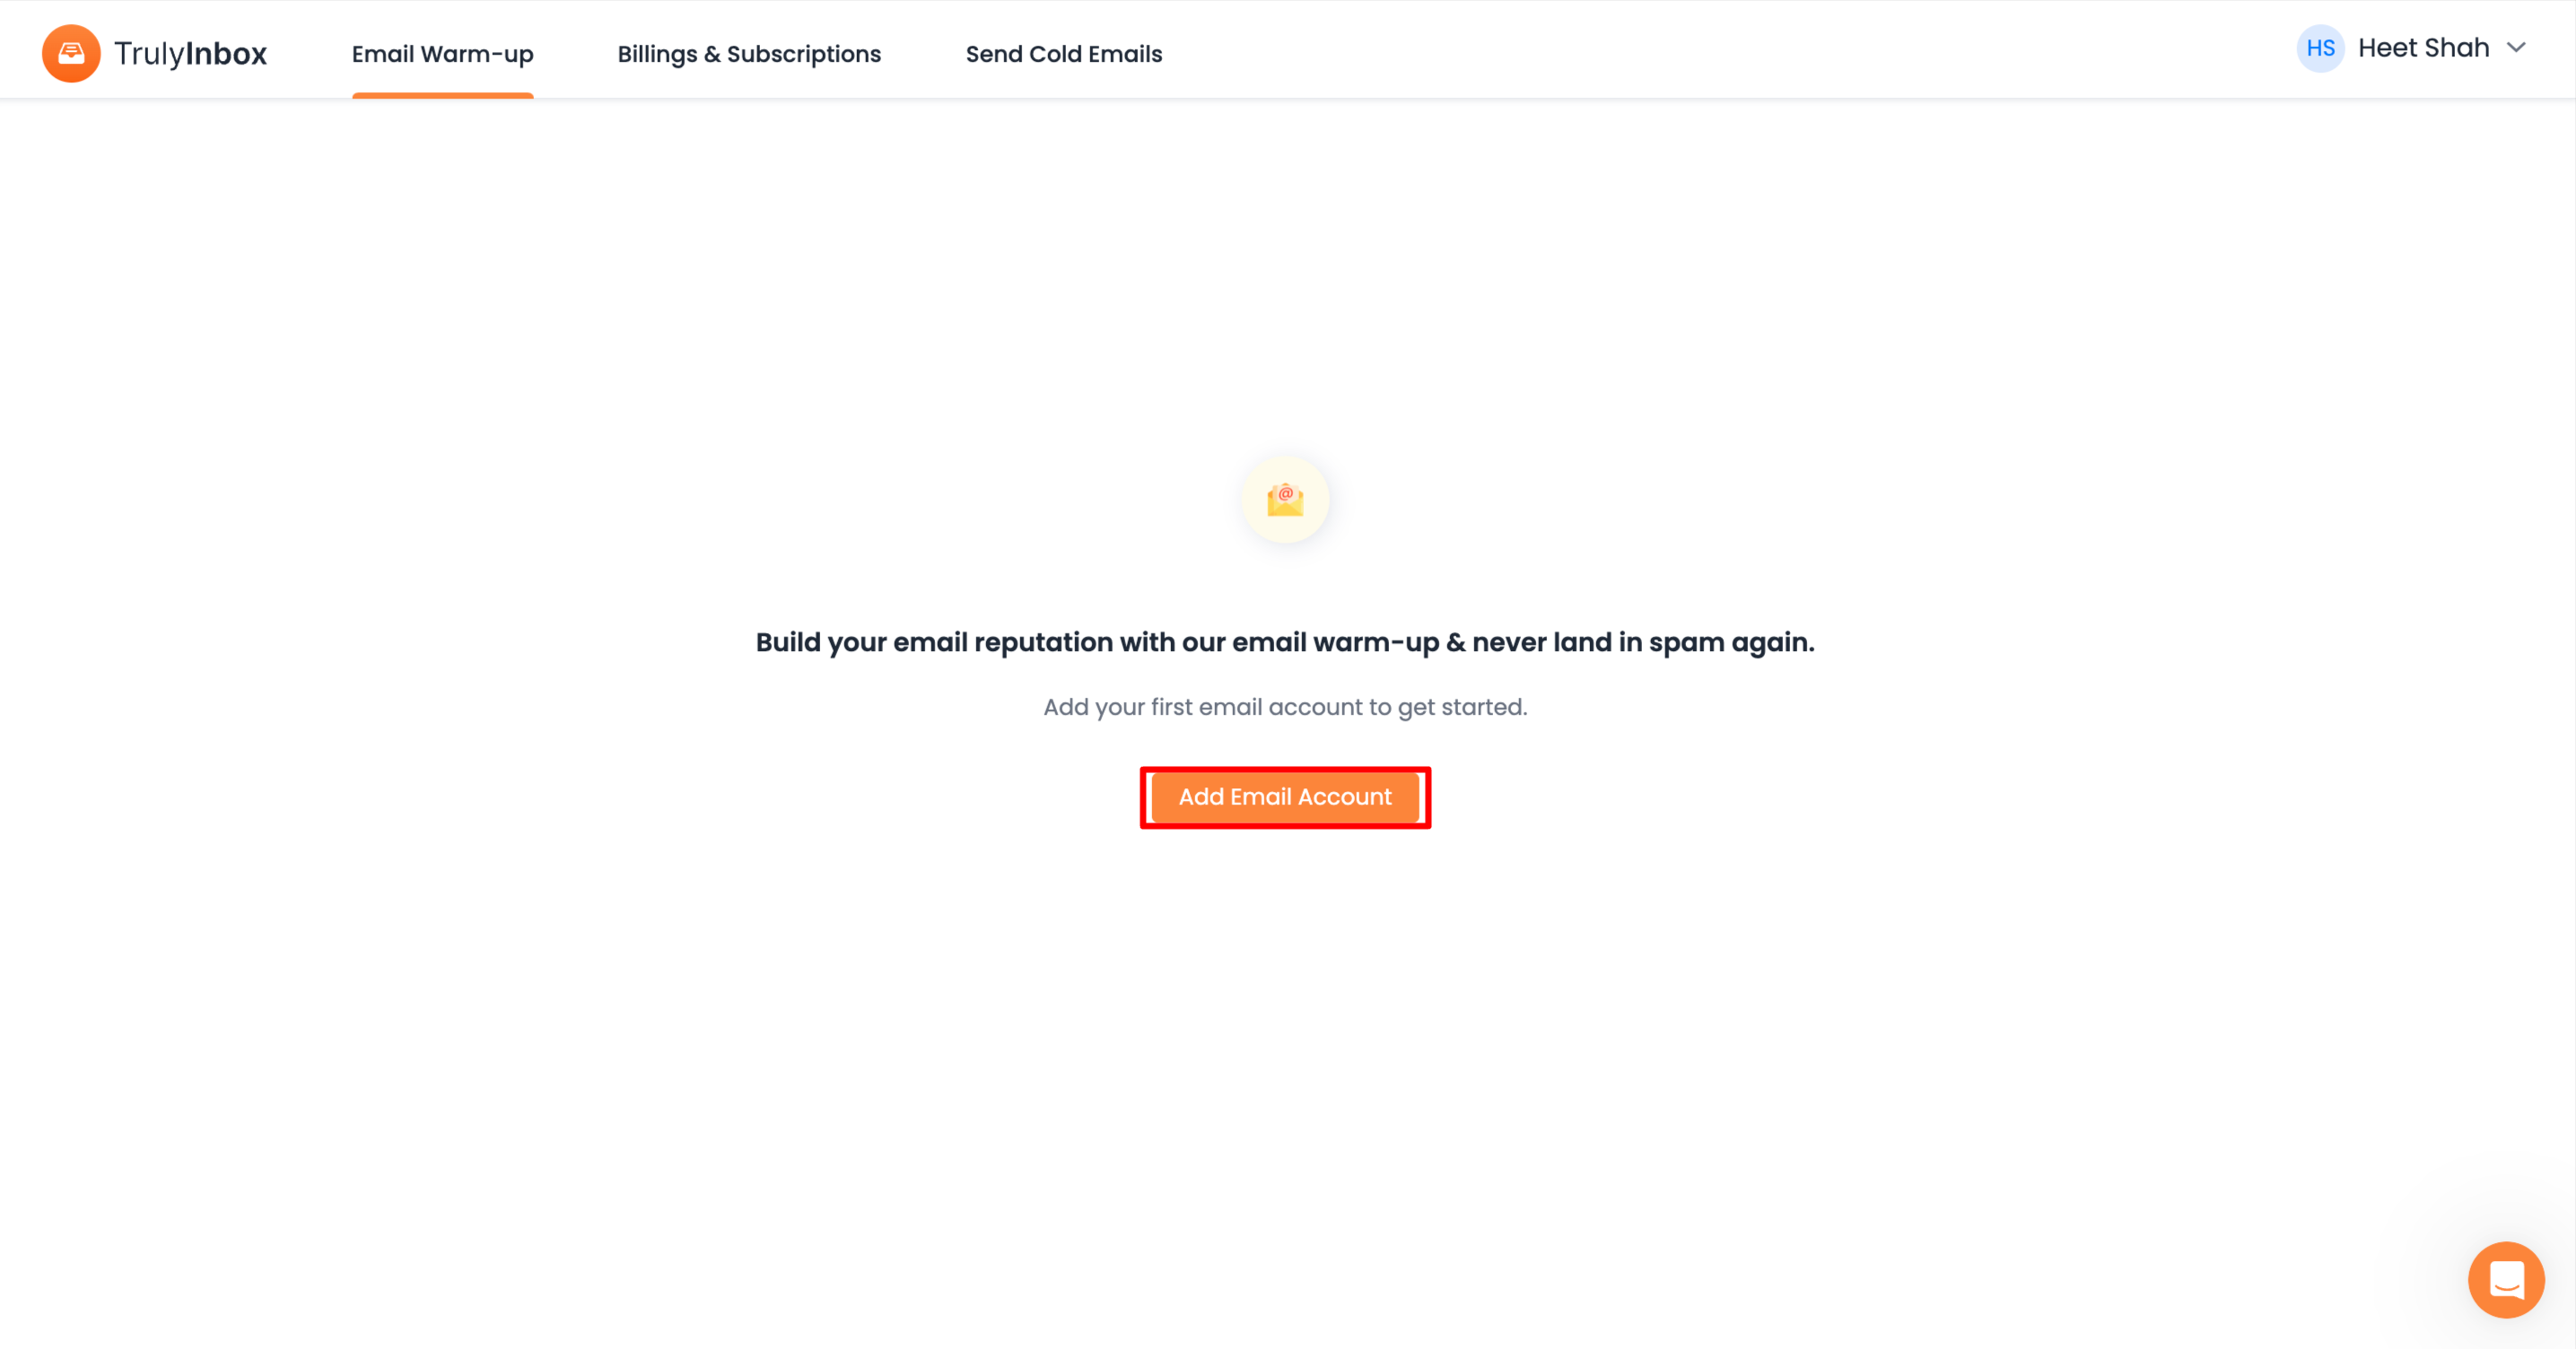
Step 1: Add an Email Account in TrulyInbox
Log in to your TrulyInbox account. From the dashboard, click the Add Email Account button located in the top-right corner.
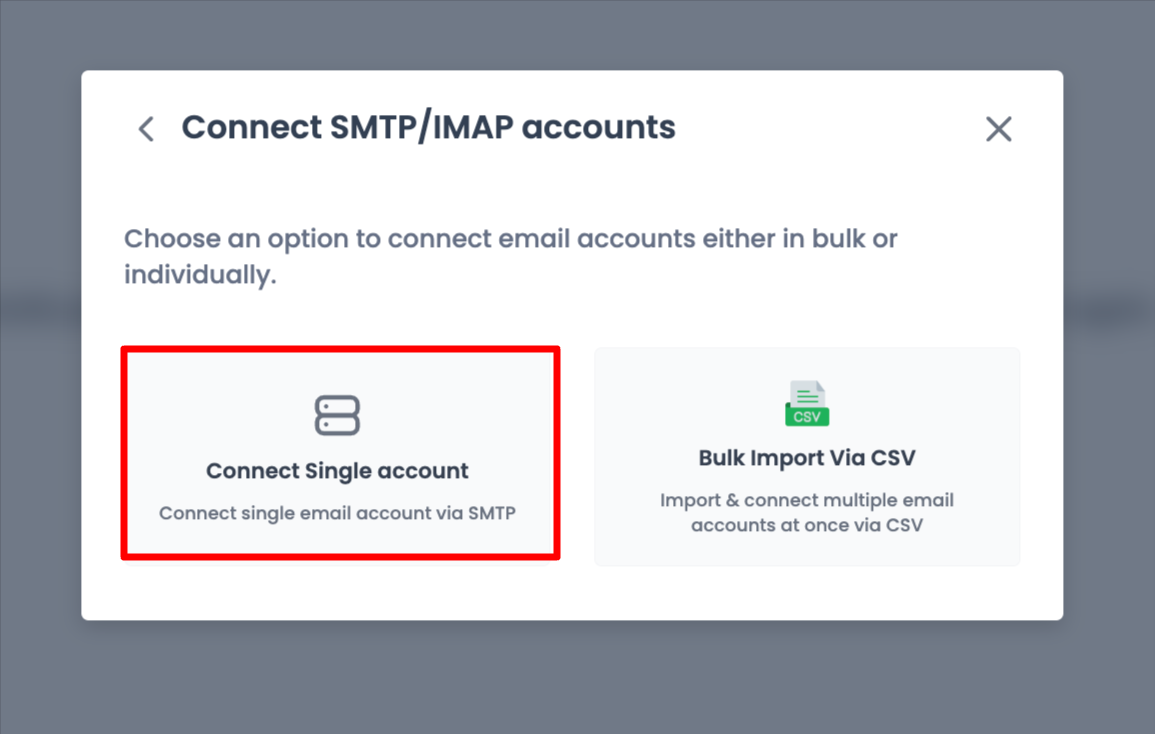
Step 2: Connect via SMTP/IMAP
Next, choose "SMTP/IMAP Account" and click "Connect."

For this, go with "Single Account."
Step 3: Enter Your Details
In the email address provider, select "Google/G Suite" and enter your Cloudflare email address. If you want to add an Alias email account, turn on "Use different username."
Step 4: Enter SMTP/IMAP Details
Enter the following SMTP/IMAP details for your Cloudflare email:
SMTP Server: mail.yourdomain.com (replace 'yourdomain.com' with your actual domain)
SMTP Port: 587 (or 465 for SSL/TLS)
IMAP Server: mail.yourdomain.com (replace 'yourdomain.com' with your actual domain)
IMAP Port: 993
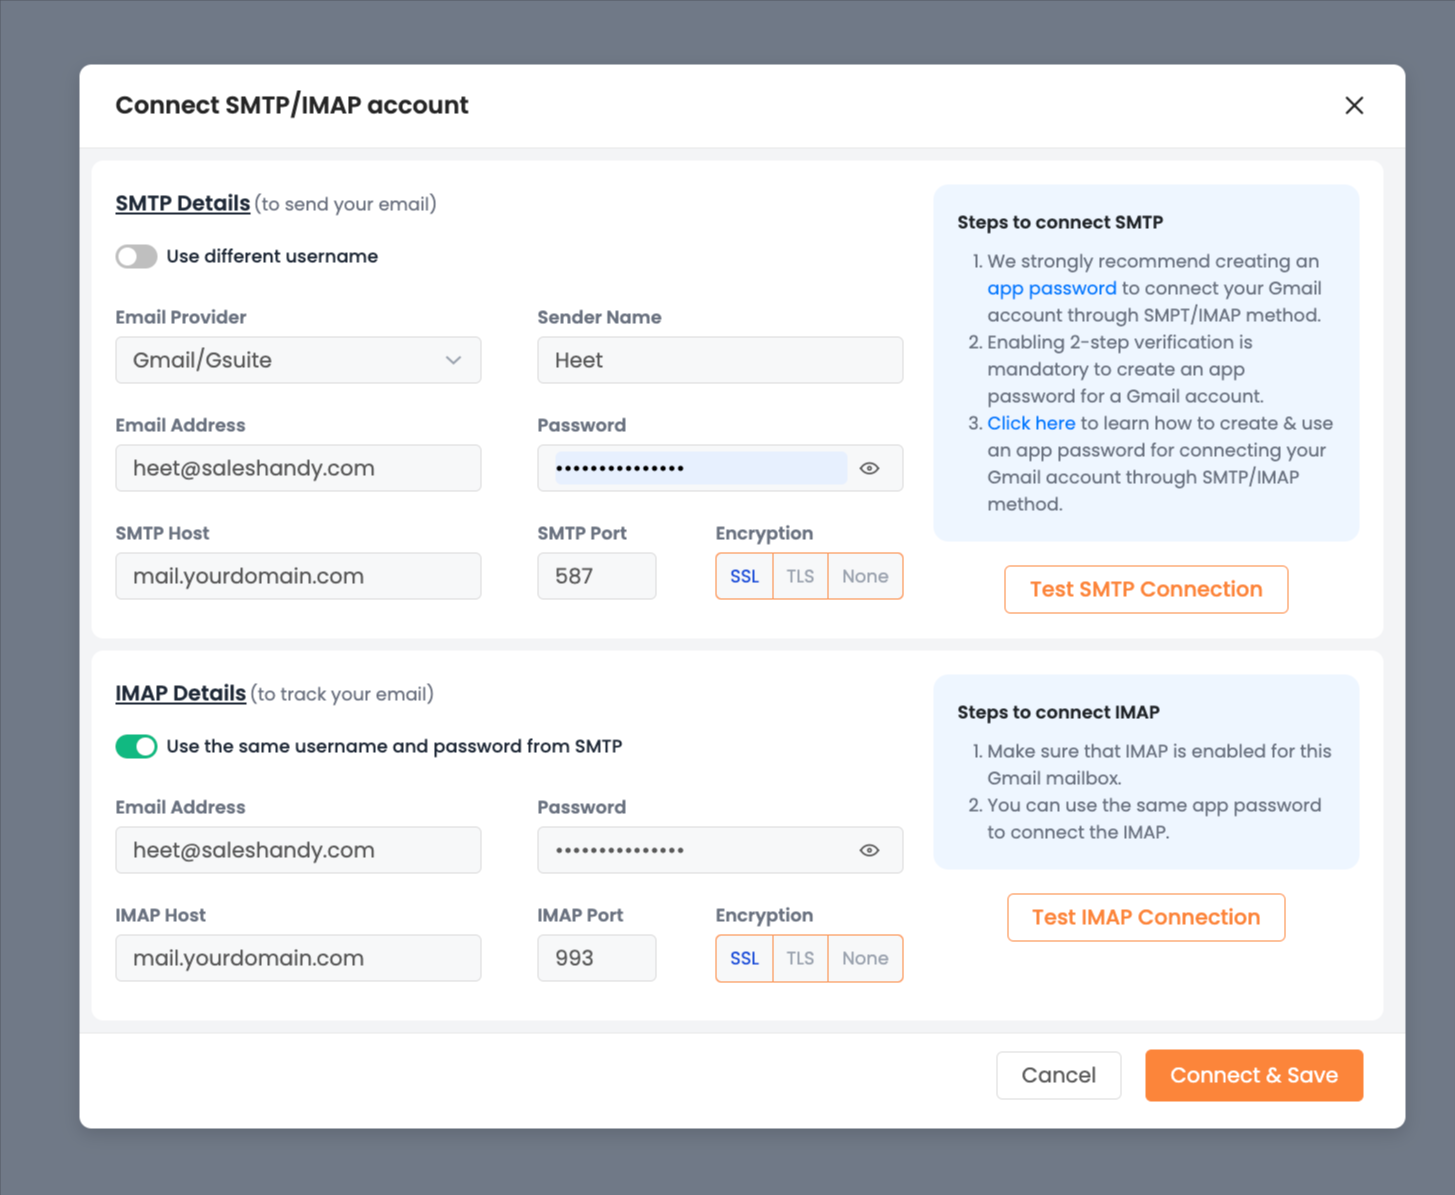
Validate that everything is correct. Enter your email address, and the password will be the one you set up for your Cloudflare email.
Step 5: Connect and Save
Once you’ve entered all the details, click "Connect" and then "Save."
You’ve just configured your Cloudflare email with Trulyinbox. Now, you’re ready to send and receive warm-up emails.
What Happens Next
Your Cloudflare email account is now connected to TrulyInbox. Warm-up emails will start sending and receiving based on your warm-up settings, helping improve your email deliverability over time.
If you run into any issues during setup, double-check your domain values or reach out to the support team for assistance.
Also check
Understanding Which Connection Method to Use And When
Connect Your Email Using SMTP (Single Account)
How to fix SMTP/IMAP "Could not authenticate" error?